The Cupcake Box Template Tutorial
This tutorial, from 2009, features a template that has since been updated and released! I made the top “fluffier!” I love the new look and I think you will, too! Go check out my new tutorial and enjoy the eye candy!

Originally released as a thank you for the participants of an online charity event, this template was created with the knowledge that most of the crafters using it would be unfamiliar with digital programs like Photoshop.
You’ll notice that your template contains a lot of different files for a lot of different programs. Most of you are traditional scrappers/papercrafters, so you’ll probably be the most familiar with the PDF “lines only” version of the template. You can ignore the rest for now, but keep them, just in case you ever decide to venture on over to the hybrid scrapbooking world! (I will address hybrid scrapbooking at the bottom of this post!)
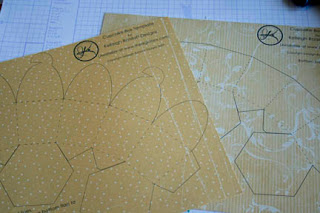
Step 1: Choose your paper and print the templates. I chose two-sided Key To My Heart B&T paper by Close To My Heart. If your printer prints borderless, then make sure you choose your borderless option. For more information about finding the borderless option, click here. If your printer doesn’t print borderless, you might need to print at 95% or so. It’s a good idea to print a test run, just to make sure!
Step 2: Cut on the solid lines and score on the dashed lines.
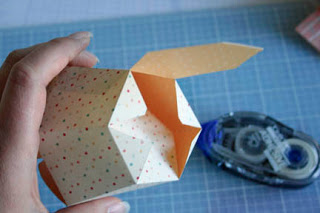
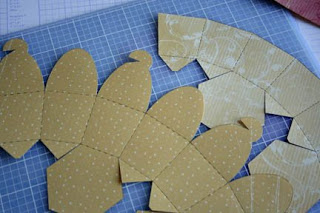 Step 3: Fold on all scored lines. Fold one hexagon to the inside, and fold one to the outside.
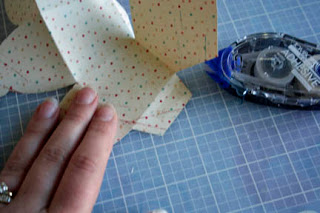
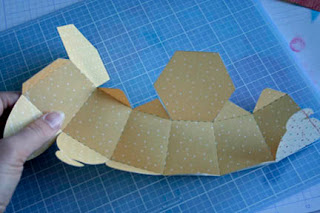 Step 4: Apply adhesive to the tab and attach to the inside of the template. Your cupcake is taking shape!
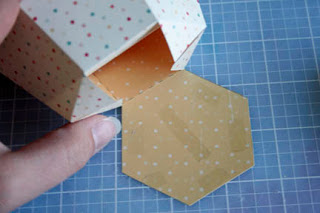
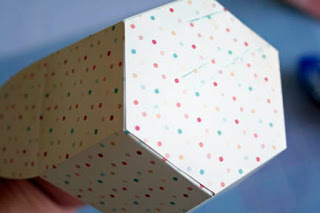
Step 5: Apply adhesive to the bottom hexagon. Remember, one of the hexagons is on the inside of the cupcake. When you close the bottom, you will sandwich the tabs between the two hexagons, creating a stronger cupcake bottom.
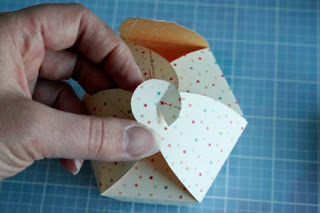
Step 6: Assemble the top by folding the plain frosting tabs to the inside first.
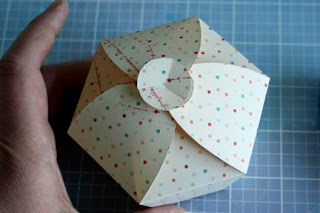
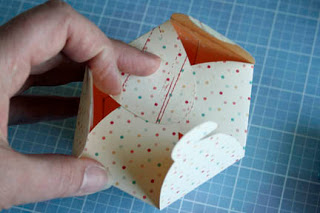 Then, fold the “cherry” tops in, hooking the cherry pieces together as shown.
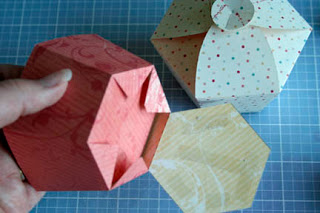
 Step 7: Assemble the “wrapper” the same way you assembled the “cake”. If you are using the digital files, you can skip this step, or go ahead and try it for some added dimension!
Now, decorate your adorable little cupcake!
I’ll show you what I did:
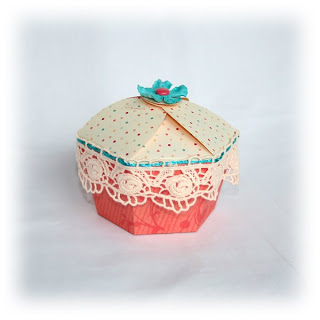 (Everything by CTMH except for the lace and the flower, by Prima!)
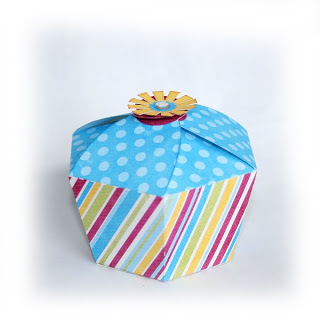
If you would like to try your hand at hybrid scrapbooking (the mix of digital and traditional), and you have Photoshop or Photoshop Elements, then check out this blog post at The Hybrid Chick to see how to add digital papers to your template! (I wrote that tutorial with newbies in mind!!) While you are there, take a look around. There are a lot of wonderful, informative articles and inspirational projects. Many of them are step-by-step tutorials with new-to-hybrid scrappers in mind!
If you get super-excited about digital scrapbooking, I’d like to suggest JessicaSprague.com to you. Jessica is an amazing teacher, and you will learn more in one class with her than you will in a whole year trying it on your own! She has some great free classes available right now, so go check them out!
And, if you liked my template, there are plenty more where that came from! Go check out my store at The Digichick, and be sure to use the coupon that was included in your SOA download! I release new products on Thursdays, and I usually put at least one product on sale for $2 Tuesdays! Subscribe to my brand new newsletter for updates on new releases, sales and special offers just for subscribers!
Don’t forget to participate in the Cupcake Challenge going on this week at Stampin’ Out Alheimer’s! I can’t wait to see what you create!
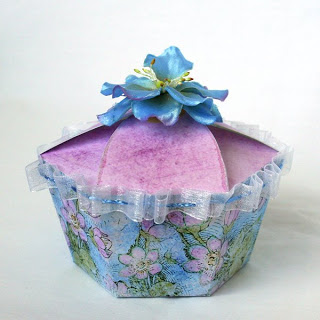
(Digital papers by Dianne Rigdon, flower by Prima, ribbon and sassy strands by Close To My Heart)
 Disclosure: This post may contain affiliate links. When you use them, you help support this site! Thank you!


 (2 votes, average: 5.00 out of 5)
really cute template! I love it. And best of all, it is sugar free.
[Reply]
Thank you for the wonderful template and the great instructions!
[Reply]
[...] back to my blog to follow my tutorial to put it all together. Then, enter the challenge! I can’t wait to see what you [...]
We’ve been having a blast making your cupcakes! Thanks for the easy to follow tutorial. You have emboldened me to try digital papers. Found your tutorial for doing one layer with Photo Shop Elements, and was wondering if there was one for using 2 different papers (one for the wrapper and one for the frosting) using plain old Photo Shop CS5. Again, thanks so much for the fun cupcake template!
[Reply]
Kelleigh,
It’s so great to see your creativity come to life in all your tutorials. Thanks for sharing!
[Reply]
The pictures in the tutorial are great. I am wondering if you have any guidance on how to get the pazzles inspiration to cut the lines? thanks
[Reply]
Am I crazy or just blind? I’m looking for your free cupcake template to try. I’ve never made a box or anything before.
Your links are sending me everywhere but where I’d like to be….please tell me the secret to finding a free template to try. Thanks
[Reply]
Hi Gail! (And everyone else.) The Cupcake Box Template was a free gift for the participants of the Stampin’ Out Alzheimer’s event in May 2009. It is no longer available as a freebie, however you can purchase it in my store!
[Reply]
[...] forget that I have a lovely tutorial (probably my most viewed post!) right here. Oh, I’m so glad my photography skills have improved since then! Yikes! Oh, [...]
[...] and beautiful Kelly Marie Alvarez, AKA, Lawnfawn Cards. She recently made the most adorable cupcake (template courtesy of Kelleigh Ratzlaff) and I just had to try and CASE her, TRY being the key word [...]
[...] template for the cupcake box was purchased online here. I’ve used the Sweet Shop polka dot embossed DSP for the bottom of the cupcake wrapper. I [...]
Leave your response!
Want to keep up with my latest news and new releases? Subscribe to my newsletter today!
Check out My Latest Creations!:
Soap Box by Kelleigh Ratzlaff Designs: This adorable soap box can be filled with tiny soaps and pretty candies! $4.99
Hourglass Box by Kelleigh Ratzlaff Designs: This uniquely shaped box is the perfect size for gift cards and trinkets! $4.99
Cash Envelopes on Etsy!
My Sponsors:
Archives
Categories
Categories
Recent Comments
Most Commented
Most Viewed